

The ability to install baseboard yourself is an extremely useful skill. It’s amazing the impact a new plinth can have on a room, especially if you choose a bold, decorative molding and use paint to enhance the transformation.
The baseboards are designed to cover the connection between the wall and the floor. They create a decorative border while hiding the gaps needed to compensate for the natural expansion and contraction of the house. They come in a variety of heights and styles, come in a wide variety of materials, and you can even buy ready-made slats with backing to save yourself the work. They are subject to a lot of use and are often hit with a vacuum cleaner or take hits from children’s toys, for example.
How to install the baseboard? – required materials:
- miter saw and hand saw
- measure tape
- hammer
- silicone and instant glue
- baseboard
- screws and nails
- spatula
- cordless drill
- wood mass
How to mount the baseboard?
Our guide is here to walk you through the process in simple steps, whether you’re furnishing one room or renovating your entire home.
Measurement
Use the measuring tape to calculate the baseboard length you need, then add 20% to the total length as stock. Baseboards can be ordered four meters or longer, so if you have long walls and don’t want unnecessary seams, keep that in mind when choosing materials.
Mark the baseboard
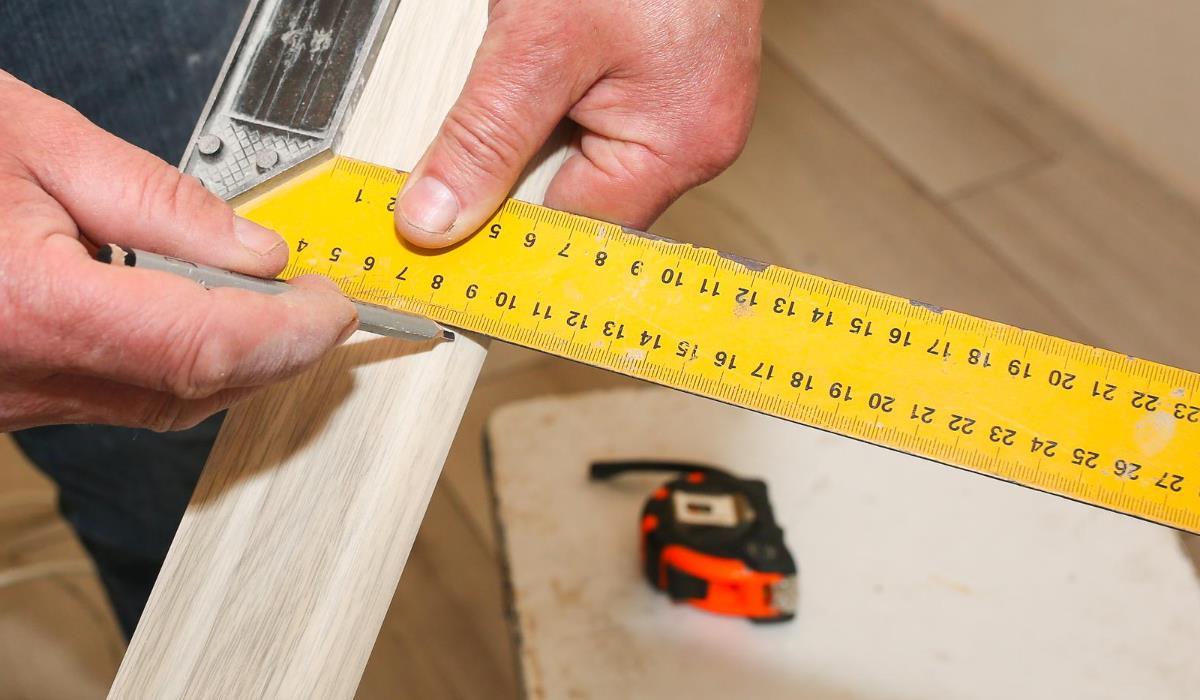
Clearly mark on each piece which side you want it to face inside the room, and how you want it to be laid out to avoid mistakes. This is especially important when ordering double-sided baseboards like the ones shown in the image above. Each side has different decorative details on top, so it’s important to know which side should face the inside of the room when cutting.
Start with simple cuts
Start with ones that can be fitted with square cuts at both ends. Measure and then use a saw to get a good, straight cut. If you are using a miter block, make sure you attach or screw it in and press the pedestal against the block before trimming. The more solid the block is, the more accurate and neat the cuts will be. Lightly sand the edges of the baseboard to smooth out any unevenness caused by the saw, as this will ensure that the joints are as accurate as possible and easier to hide.
Attach the first item
Apply glue and place the baseboard against the wall, then remove excess glue. If you want to screw the baseboards to a drywall wall, mark the position of the wooden uprights, then pre-drill through the baseboard and wall. If you are screwing them to a solid wall, pre-drill through the baseboard to mark the wall every 6 cm. Drill and place anchors. The holes should be countersunk with a larger drill bit so that the screw heads disappear after fastening. The screws should be long enough to penetrate the pedestal and reach at least 3 cm to the wall or uprights. Use wood mass to cover the holes before painting the baseboards.
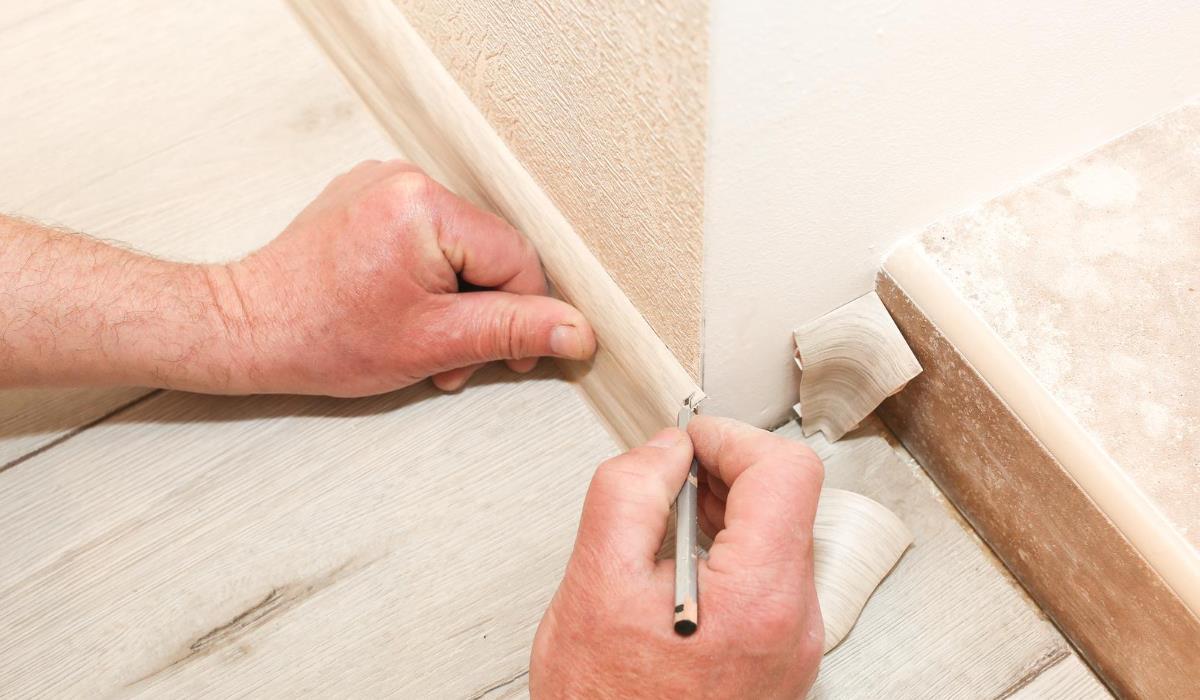
Align the baseboards with the inside corners
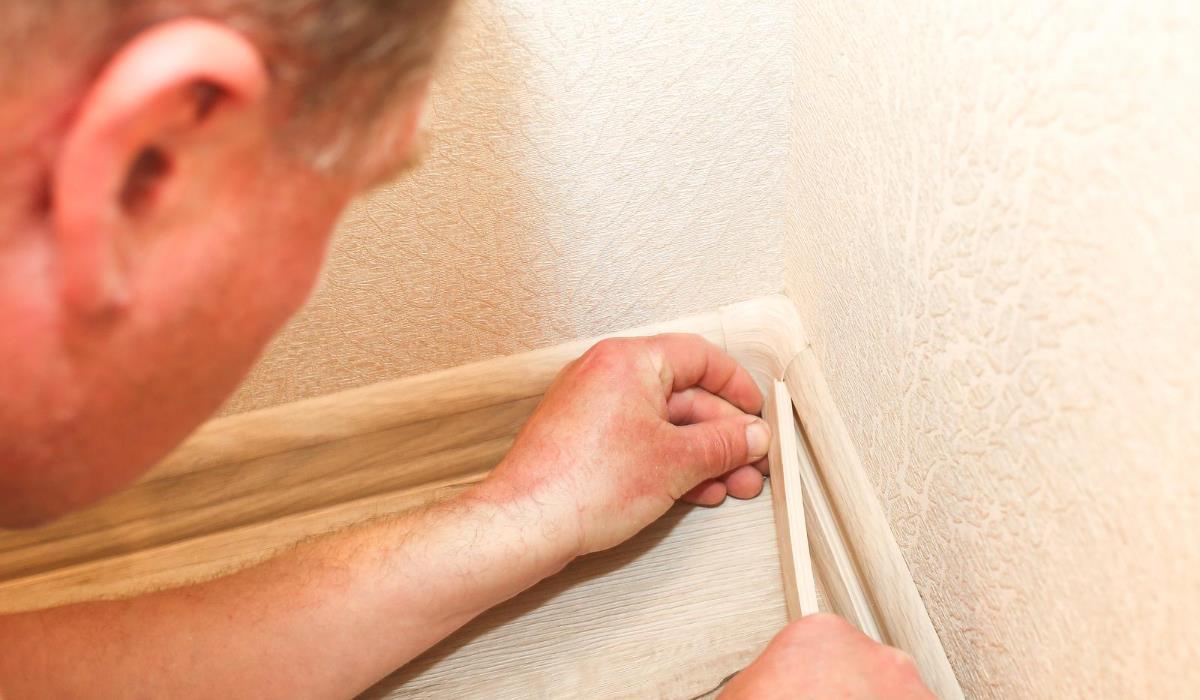
The next element you mount must be “cut” to fit into the one you have already attached to the wall. To do this, first cut a new piece at a 45-degree angle. Then use a hand saw to remove excess material. You will be left with a profile that will fit into the part already fixed on the wall. Try it on a piece you don’t need first. This method is better than relying on two 45 degree cuts, which only work if your corners are exactly 90 degrees and your walls are perfectly straight.
Check and mount
Check that the baseboard you just cut fits nicely into the one you have already attached to the wall. If you are satisfied, cut or prepare the other end and fix it on the wall. Plan the arrangement so that they always connect the straight end to the cut end, never cut both ends.
External corners
For a neat joint, cut both pieces at a 45-degree angle where the baseboards meet at the outside corner. Measure both baseboards to the corner, then mark this length on the back. Place the first one on the cutting saw at 45 degrees, align the saw, set at 45 degrees, with the mark you made, and trim.
Cutting external angles
Make sure you cut the second baseboard so that the 45 degree angle is in the opposite direction so that they meet. Make the opposite cut by moving the miter saw to the other side of its axis.
Addjust
Always assemble the paired outer corners at an angle so that they can fit together. Instead of attaching one and then trying to trim the other to fit.
Fill in the gaps
When finished, fill in any gaps between the wall and the top of the baseboard with decorator’s putty, then rub the joint with a damp finger for a neat finish. Let dry before painting.
What if the baseboards are not long enough?
If your baseboards are not long enough to reach from one corner to the other, you will need to add a joint along the wall. Connections should be placed in such a way that they are invisible in the least exposed place. If you need to join any pieces along a straight wall, the best way to join is to cut the end of each piece at a 45 degree angle (same direction) so that one piece slides over the other. Add some instant glue to the joint and remove excess with a damp cloth. You can also add one or two nails to secure the joint and prevent baseboards from moving. After the glue dries, sand the joint to make it smooth, remove any dirt and the joint will be ready for priming.


