Removing grout from tiles is a task that may seem difficult, but it is actually very easy and quick. Depending on the size of the tile area, this task can take as little as an afternoon. While this can be done manually, purchasing multifunctional tools or professional help will make the task much easier. Thanks to the practical tools, you can remove approximately 1.4 square meters of grout on 10 by 10 cm tiles in about an hour, and the flexibility of the tool allows you to remove grout and adhesive by changing the tips.
There are several good reasons why you may want or need to remove old grout from your tiles:
- the old grout may be moldy and impossible to remove. In many cases it is quicker and easier to remove grout than to clean it.
- you no longer like the current grout color and want to change it. One way to change the grout color is to paint the existing grout. However, a more effective way is to use a completely new, colored grout.
- the grout is damaged and falls out. Fixing this by applying a new grout is not always effective; it is better to remove everything and apply a new grout.
How to do it?
Put on your safety glasses first. Equip the oscillating tool with a blade designed for grout removal. Start by holding the tool horizontally (or vertically for vertical joints), turn on the power and gently press the blade against the joint. Let the tool work, don’t put too much pressure on it. The blade should easily cut through the grout. After removing as much grout as possible by holding the tool horizontally, it’s time to gently adjust the blade to remove more grout. Work slowly and patiently so as not to damage the edges of the tiles. One way is to rest your arm on the toolbox so you don’t damage the insert as you work.
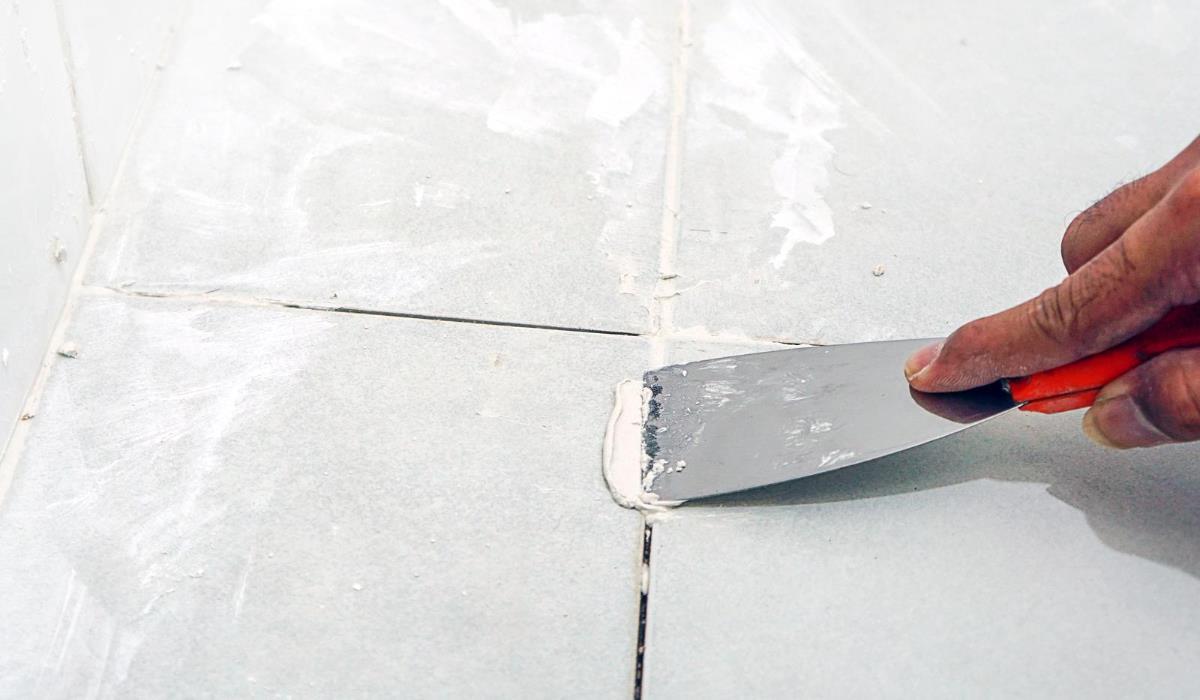
The next step is to use a utility knife with a blunt blade if you still find bits of grout. A dull blade is better for several reasons: First, there’s no point in using a nice, sharp blade for grout. Use that blade for something else first. Second, you don’t want to risk breaking the sharp points of a utility knife and getting injured. Vacuum crevices as you work. This will allow you to see what you are doing and loose materials from the joints will be removed. This minimizes clutter in your workspace. After removing the grout, wipe all the gaps.
Removing grout – important tips:
- make sure you use a mason’s blade in an oscillating tool. Blades for metal or wood are unsuitable and require more effort
- For fragile tile areas, apply a strip of painter’s tape or duct tape along the tile seam to protect them
- to protect the surface of the tile, you can stick cardboard on it
- if you manage to remove the grout all the way, that’s good. But if you can only remove to a depth of approx. 3 millimeters, it will not be a problem. When reapplying grout, you do not have to remove it all the way to the substrate
- if you are using a battery powered oscillating tool, you can use water to bind the dust. Lightly spray the surface of the tile
- if you have difficulty seeing your work due to grout dust, turn on the vacuum cleaner and keep the tip close to the tile seam as you work. Make sure you equip your vacuum cleaner with a HEPA filter to avoid dust spreading around your home.